
So here's one of my latest projects! Well to be honest, there are always about 6 on the go at any given time, but I'm actually finished this one! I am pretty sure I can hear the angels (and James!) rejoicing. So the picture above are chairs (there are actually 8 of them) that are from our kitchen table set. It was another Kijiji steal we snagged some time last year. I was serious when I told you we have literally furnished our entire place thanks to Kijiji!! The table set was such a sweet deal. It was only a few years old, solid wood, bar height, modern, in great condition AND it seats 8! We were pretty stoked because with both James and I having large families, we are always adding more seats....well we still need a lot more...but we are closer!
We sold the table and chairs we had for the same price they were bought for (my MIL got it at an auction for a killer price) so in the end we only paid $200 for it. Pretty sweet since new it would've set us back between $1,500 -$2000! The only NOT sweet thing was the seats. They look half decent in the picture above, but up close they look like this

No, those aren't marks on your computer screen...the seats are just that dirty...and they look worse in real life. Truthfully, they weren't really this bad until last weekend when we had our friends and family over helping us roof (we know how to host a paaarrrtay! haha) Roofing boys + dirty pants + not wipeable white cotton = time to recover your seats!! I planned on it anyways (anticipating kids and white seats we can't wipe? what a joke) but after last weekend I decided I should do it sooner than later ; )
It made the world of a difference! It was a bit time consuming, but fairly simple for the most part. I was given a roll of black "leather" a while ago, so I decided to go with that since it was free, black and easy to wipe!
The tools:

So first was simply unscrewing the seats from the chair frame,then flipping it upside down on top of the fabric, good side facing out.
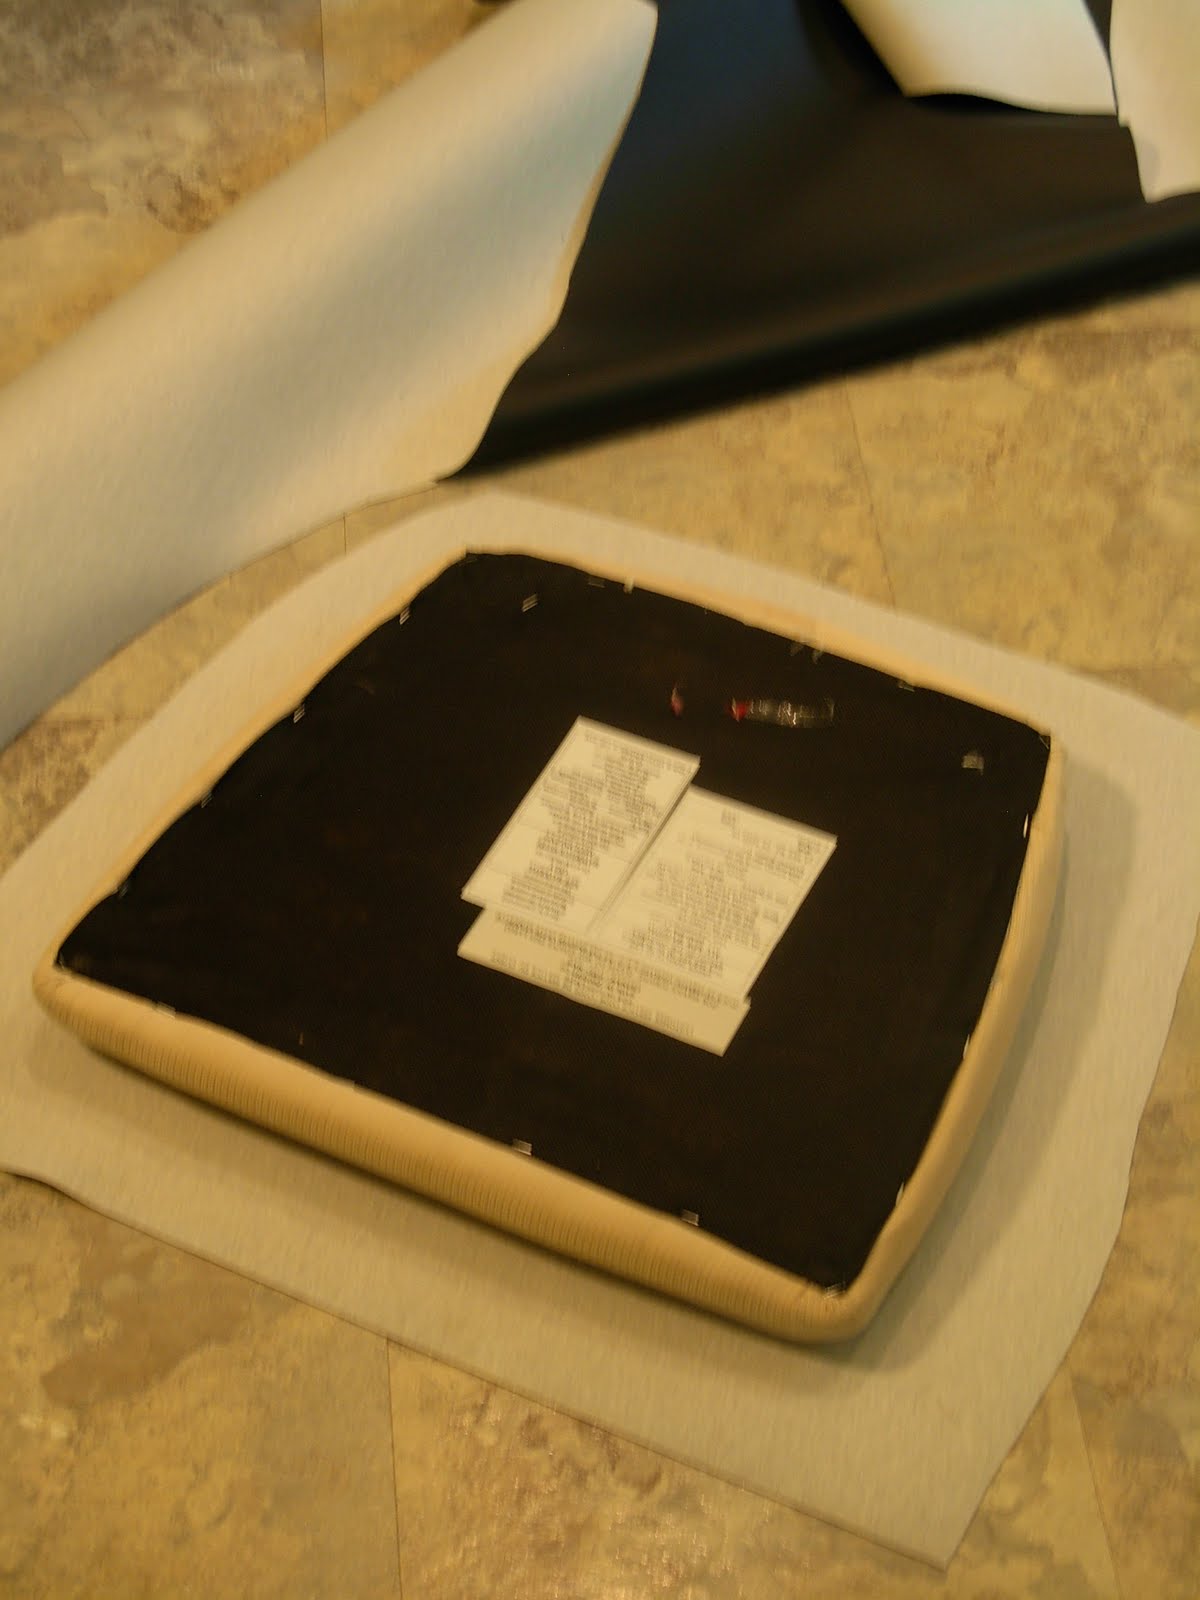
Following the shape of the chair seat, cut around leaving about a 1-2in border, depending on how thick the seat is. It's basically like wrapping a present, just a little more tedious! I think it might have been easier had my fabric been cotton or something thin, but since I like to do things the hard way....yeah, it was really thick and really hard to work with. So in the effort to make the corner folds as perfect and as tight as possible, I cut almost an L shape to remove some of the bulk

Definitely try folding it a few times to be sure exactly where and how much you need to cut BEFORE you cut! I started off by doing one staple on one side of the seat, pulling the fabric tight and then stapling directly across on the opposite side. I found this the easiest way to do it. It holds the fabric tight in place and then you can work your way around the seat from there. So after a few hours (ok, a bit more than a few) a couple thousand staples, 8 chairs and fabric that fought me the whole way (did I mention choose THIN fabric!) I finished with a bunch of these

And after installing the seats back on the chairs, I was left with this


Much better! I had to get over my perfectionist ways and just deal with the fact that there will be SOME wrinkles here and there around the corners...PICK.THIN.FABRIC. Unless I am taking a close up (forgive the not-so-awesome pics, I'm having camera troubles *sigh*), you don't notice it at all though. So now my kitchen chairs are clean and will stay that way thanks to the easy to wipe, black (take that kids with sharpies and art skills!!) fabric. James already tested them out with his salsa, and I am pleased to say they clean just fine : )
And just incase our kids end up being anything like I was (or my brothers) I saved enough fabric to recover 2 chairs if need be. You know, for when some awesome kid decides to slash a Z for zorro in them ; )
I like to THINK I am ahead of the game....but then kids are really sneaky like that...they'll somehow know I can cover the chair again, so they'll make sure they carve it in the wood instead. Haha, was that just my family or do you have kids like that too?
These turned out great!!
ReplyDeleteI am loving this site and plan on following it regulary ~ Great writing and so many different topics :)
~Adey (Trista's sister)